Homemade Chocolate

Good News for people residing in Hyderabad......Click on "Homemade Chocolates & Cakes" (above) to know more.......Do join my FB page ( https://www.facebook.com/Chocofantasy) to get new updates.


Showing posts with label Homemade. Show all posts

Wednesday, 8 June 2016

Baked Donuts / Doughnuts (No-Knead)


Who doesn't love donuts?  We all do, right? 

I love baked donuts more than the fried ones.... I know, fried ones tastes more yummy than the baked ones. 

But iam a person who try to avoid or lessen the use of unhealthy stuffs in my cooking or baking. Somethings cannot be changed to get the required result, but some ingredients or method can be changed. Thats how i ended up baking donuts....

This is not the first time iam attempting to bake donuts....No....I tried many times and was not at all satisfied with the texture or taste of the end product. But, this one is just right...A sure keeper in my recipe book. So, here iam sharing this with all my friends out here.

The main attraction of this recipe is that, no workout needed for your hand muscles, to make these yummy ones... In short.......No kneading required. Just mix and let the yeast do its work......  Isnt it a relief? 

Do try it out and let me know... 


Ingredients

Maida 3 ¾ cups (575g)  
Dried yeast (active or fast action) 2 tsp
Salt  1 tsp 
Milk (warmed) ¾ cup (200ml)  
Butter (melted ) ¾ cup (170g) 
Eggs 4 (room temperature)
Honey ¼ cup ( 80g) 
Vanilla extract 1 tsp 


Method

1. In a large bowl add maida, yeast and salt. Mix well together. (Dont put salt on top of the yeast)
2. In a separate bowl, whisk together milk, eggs, honey, melted butter and vanilla extract.
3. Mix the wet into the dry with a spatula until you get a wet loose dough. Cover tightly with cling film and lay a towel over the top. That’s it, no machine needed!! You may have some lumps in the dough but don’t worry, they will disappear. 
4. Leave it at a warm place and let it rise for 2-3 hours. 
5. Once doubled in size, place the dough in the fridge overnight, roughly for 12 hours. The dough will be loose but will firm up when chilled. Don’t try to knead after 3 hours, it needs to be chilled 
overnight. 
6. Next day, to form your Donuts: On a floured surface, roll out your dough to ¼ of an inch thick. Using a round cutter cut out round pieces of dough. To cut the hole in the middle , use a smaller sized cutter. Even the small rounds also can be baked as such.
7. Place them on a baking tray lined with butter paper.  
8. Cover your donuts with a towel and leave to rise again at room temperature for 20-30 minutes. You will know when they are ready, because they will puff up.
9. Gently brush the donuts with melted butter.
10. Bake at 190 degree celcius for 15 minutes. Keep a close eye on them, so they don’t get too brown. 
11. Once out of the oven, dip them in the glazes. Do this straight away, because it soaks into the warm donut and creates a lovely crisp glaze. 
12. Enjoy them fresh.


Note:

1.The dough can be kept for 3 days in the fridge.


Vanilla Glaze

Ingredients

Powdered sugar 1 ½ cup (187g) 
Milk 2-3 tbsp 
Vanilla extract 1 ½ tsp

Method

1. In a medium bowl, whisk together all ingredients.
2. Whisk until silky and smooth. 
3. If you want it thinner add a little more milk
4. Store the icing at room temperature in an airtight container for 2 weeks. 

For Chocolate Glaze, add 4 tbsp unsweetened cocoa powder, along with the other ingredients mentioned for the vanilla glaze.


Thanks for visiting
Happy Baking!!


Tuesday, 3 November 2015

Diya Aur Bati


After a long time, iam posting a recipe on my blog. Had been busy on and off with my baking and chocolate orders, that it was finding difficult to sit down and write in my blog. I missed my blog a lot, but it happens sometimes, that when we need to concentrate on some things, we unknowingly miss on something else, which we loved the most. But in my case, I was not missing on my passion for food, as I was doing stuffs related to food, just that i couldn't blog. While creating new designs in cakes and making chocolates, I felt myself so happy and lively. You can check my works on my FB page : Nim's Choco Fantasy

Ok, now that's it for my re-entry into my blog :) Just wanted to tell you all that I was not away from my passion, but yes, i was a bit away from blogging.

Diwali is round the corner. All might be busy making yummy and awesome sweets. I would like to share a recipe, which you all might be knowing, just that I gave a slight twist, and gave a new look and feel of festivity to it.

Enjoy Diwali with your loved ones and stay safe.


Ingredients
 
1 cup Desiccated Coconut
1 cup Khoya
¼ cup Sugar (powdered, adjust as per your taste)
3 tbsp Cocoa powder
8 – 10 Almonds
A pinch of Lemon yellow colour
Few drops of Rose water
Silver warq for garnishing
 
 
Method
 
  1. Cook khoya in a fry pan till it turns slightly pink in colour. Now add desiccated coconut and sugar. Mix well and let it cook for about 2 minutes till the sugar is nicely combined with the mixture. Switch off the flame.
  2. Keep aside 5-8 tbsp of the mixture in another bowl and add lemon yellow colour and rose water. Mix well.
  3. In the rest of the mixture, add cocoa powder and mix well to form a smooth dough.
  4. If the dough is too dry, add little milk to it and if it is too wet, add little desiccated coconut.
  5. Shape the cocoa mixture in the shape of a diya and fill in the yellow coloured khoya mixture in the center.
  6. Place an almond as flame and garnish with silver warq.
  7. Your Diya aur bati sweet is ready to be served.
  8. Enjoy!!!


Thanks for visiting
Happy Cooking!!

Thursday, 18 September 2014

Homemade Khoya/Mawa


Khoya/Mawa is used as the base for a wide variety of indian sweets. Khoya is made by simmering full-fat milk in a heavy bottomed vessel for a long time, till it becomes thick. They are used in gravies too.


This time I used khoya for making mawa cup cake and it was yummy and delicious. You can click on the link to know the recipe for Mawa Cupcake


Ingredients
 
6 cups Full Cream Milk
 
 
Method
 
  • Pour the full cream milk in a heavy bottomed pan. Keep stirring in between and scrap out the sides.
  • Stir continuously and keep scraping the sides. Keep a close eye on the milk as it tends to burn in the bottom. Let the milk boil for 30 minutes. Now the milk will reduce to half the quantity.
  • After 15 minutes, the mixture will start to thicken. Keep stirring. At this stage, the mixture tends to burn easily, so keep stirring and scrap the sides constantly.
  • After 5 minutes, you can see that the mixture forms into a lump and comes off easily from the sides. At this stage, switch off the flame and let it cool down completely.
  • Once the khoya is cooled, it will become thicker. Khoya is used for making many indian sweets or you can even add it in curries.


Thanks for visiting
Happy Cooking!!

Wednesday, 16 April 2014

Chat Ki Chutney


I tried out this chutney for making chatpate aloo chat. It is really tasty... kind of sweet, sour and spicy taste... Saved the rest of the chutney in an airtight container in the fridge and it stays good for 1 - 2 months or more than that. I serve it along with samosas too and it tastes yummy...

Try it out and let me know how you liked it..


Ingredients

1 cup Sugar
3/4 cup Water
2 tbsp. Amchur powder/ Dry Mango powder
1 tbsp. Kashmiri Red chilli powder
1 tsp Jeera powder
1 tsp Black salt
1 tsp Ginger powder
1 tsp Fennel powder
Salt to taste


Method
  • Pour water in a kadai and add sugar to it. Keep it on medium heat and let it boil till the sugar is dissolved.
  • Add amchur powder, Kashmiri red chilli powder, cumin powder, black salt, ginger powder, fennel powder and salt. Mix well so that no lumps are formed.
  • Let it cook till the chutney becomes slightly thick. Once done, take off from heat and keep aside to cool.
  • Use this chutney on any type of chats or you can serve it along with samosas.


* I usually take the quantity of the ingredients as per my taste. So you can always adjust the spices as per your taste*


Thanks for visiting
Happy Cooking!!

Wednesday, 26 March 2014

Homemade Fondant


I have seen many recipes for making homemade fondant, but was reluctant to try out any of them, thinking if it would come out good or not. At last, rounded off to Veena's recipe as I had tried out many of her other recipes and all had come out good. But some of the ingredients were not easily available. So I was waiting to get all of them or the substitutes, so that I can start off.


Many people had asked me to give a homemade fondant recipe. I had told them to wait, till I try out a recipe and if it come out good, then I will share. So friends, here's the fool proof recipe for homemade fondant...


I was in need of some fondant to decorate a cake and good brand is not available now in stores. So I had no choice, but to try out this recipe. Now I regret, why I didn't try this earlier. It is so tasty and yummy. Can be thinly rolled out. I am really thankful to Veena for sharing her recipe.


This recipe makes about 1100 to 1200 grams of Fondant.

Recipe Source : veenaartofcakes

Ingredients

1/4 cup Fresh Whipping Cream (or non-dairy whipping cream)
1 1/2 tbsp Gelatin
1/2 tsp Meringue powder or (1/2 tsp Gelatin)
1/2 cup Light Corn Syrup or (Glucose Syrup : 1/2 cup minus 2 tbsp + 1 tbsp water)
3 tbsp Butter or Veg Shortening.
1 1/2 tbsp Glycerin
1/2 tsp Salt
2 tsp Vanilla extract or other flavouring.

1 kg Icing Sugar or Powdered Sugar


Method
  • Keep all the ingredients needed for making this fondant ready, as you have to work fast after melting the gelatin.
  • In a microwave safe bowl, put the cream and add gelatin into it. Mix well and keep aside for 2 minutes until it blooms.
  • Later, place it in the microwave - Power High for 10 seconds. Take out and mix. If gelatin is not melted completely, put it back in the microwave for another 10 seconds. Do this process, until gelatin is nicely melted and you get a smooth mixture.
  • In the mean time, take a big bowl and put 700 gms of icing sugar in it. Make a well in between and keep this aside.
  • When the gelatin is nicely melted in the cream, add butter. Mix well. The heat in the gelatin cream mixture will be enough for the butter to melt. If small bits of butter is seen without melted, no probs, you can go ahead with the next ingredient.
  • Next add glucose syrup or corn syrup. Mix well. Add salt. If adding meringue powder, add it now. Mix well.
  • Next add glycerin and vanilla extract. Mix again. You will get a gooey mixture. If you see that it is bit liquidy, no problem go ahead with the next step. (Make sure that this mixture is not hot or warm. By the time you mix all the ingredients, the mixture should come to room temperature)
  • Add this mixture into the well which we had created in between the icing sugar.
  • Mix gently by folding in the icing sugar from the sides. Use your hand to mix all the icing sugar into the liquid mixture. When it starts to stick, add the rest of the icing sugar, little by little. Transfer it onto a clean kitchen surface and knead well. If you are able to make it into a smooth dough, stop kneading and transfer it into a zip lock bag or cling wrap it. Place it in an airtight container and place it in the fridge overnight to rest.
  • When you are ready to decorate your cake with the fondant, take out the container (with fondant) and let it come to room temperature for about 2 hours. Later, take out the fondant and knead again till it becomes soft. If bit sticky, add little corn flour on the surface and knead again. If more sticky, add little icing sugar and knead again.
  • Your homemade fondant is ready. You can roll it really thin and taste is simply awesome.

Note:

  1. You can store this fondant in room temperature for about a month. But i would recommend to store it in the fridge till you use them. In summer, keep the fondant in the fridge and it will stay fresh for up to 3 months. Keep in the freezer, if you want to store for longer period. Whenever you need to use the fondant, take it out about 2 - 3 hours before or keep outside overnight. Knead again and you are good to go.
  2. As many of the ingredients are not available easily in India, I have used substitutes. Like, instead of meringue powder, I used gelatin and instead of light corn syrup, I used glucose syrup (quantity is mentioned above).
  3. The gelatin used instead of meringue powder, was added to the cream (in the beginning) along with the 1 1/2 tbsp. gelatin for melting.
  4. All the ingredients should be kept ready before starting to make this fondant, as we have to work fast.
  5. I used Amul fresh cream which worked really fine. If you have whipping cream, go ahead with that.
  6. Initially, take only 700 gms of icing sugar. Later add little by little till you get a soft dough.
  7. Even after using 1 Kg icing sugar, you feel that the dough is bit sticky, no problem, store it in the zip lock bag, in the container and keep in the fridge overnight. Next day, it will be fine and not sticky. If still it is bit sticky, while kneading add corn flour and if more sticky add bit of icing sugar.
  8. You can check Veenaartofcakes if you would like to see the video as to how to make it.
  9. I had used yellow butter and dark coloured vanilla extract, so I couldn't get the perfect white fondant. It is an ivory coloured fondant which I made. If you want a white fondant, use white butter and light coloured vanilla extract or any other flavouring.


Thanks for visiting
Happy Cooking!!

Thursday, 24 October 2013

Soft Caramel Sauce (Dulce De Leche)


Dulce De Leche is a thick caramel flavoured sauce, which can be used in different recipes or topped in ice creams, desserts etc. It can be used as a spread too... It's your choice...enjoy as it is or include in any of your desserts to make it more yummier.....


Ingredients

4 cups Milk
2 cup Sugar
1 tsp Baking Soda
1/2 tsp Vanilla extract


Method

  • Boil milk in a big heavy bottomed pan. When it is boiled, add sugar, vanilla extract and baking soda. Stir well until the sugar is dissolved.
  • Once boiled, keep it in very low flame for 1 hour. Wash down the sides of the pan using a pastry brush dipped in water.
  • After every 15 minutes, scoop out the froth.
  • When it is about an hour, you can see that the mixture turns to a thick deep brown colour caramel. Make sure that it doesn't burn in the bottom of the pan.
  • Immediately pour the caramel through a sieve, so that you can avoid any bits of caramel which might have caught on the bottom of the pan.
  • Pour the caramel into a bowl and let it cool. It thickens after it cools. 
  • Store it in an airtight container or in a zip lock for later use.
  • Pour this on ice creams or any desserts and Enjoy !!!

Note:
  1. I liked my caramel sauce to be slightly thin and not too thick. Its up to you, you can decide the consistency of the sauce.
  2. The caramel tends to thicken after it is removed from the fire. So keep an eye on the consistency you need the caramel to be.


Thanks for visiting
Happy Cooking!!

Wednesday, 14 August 2013

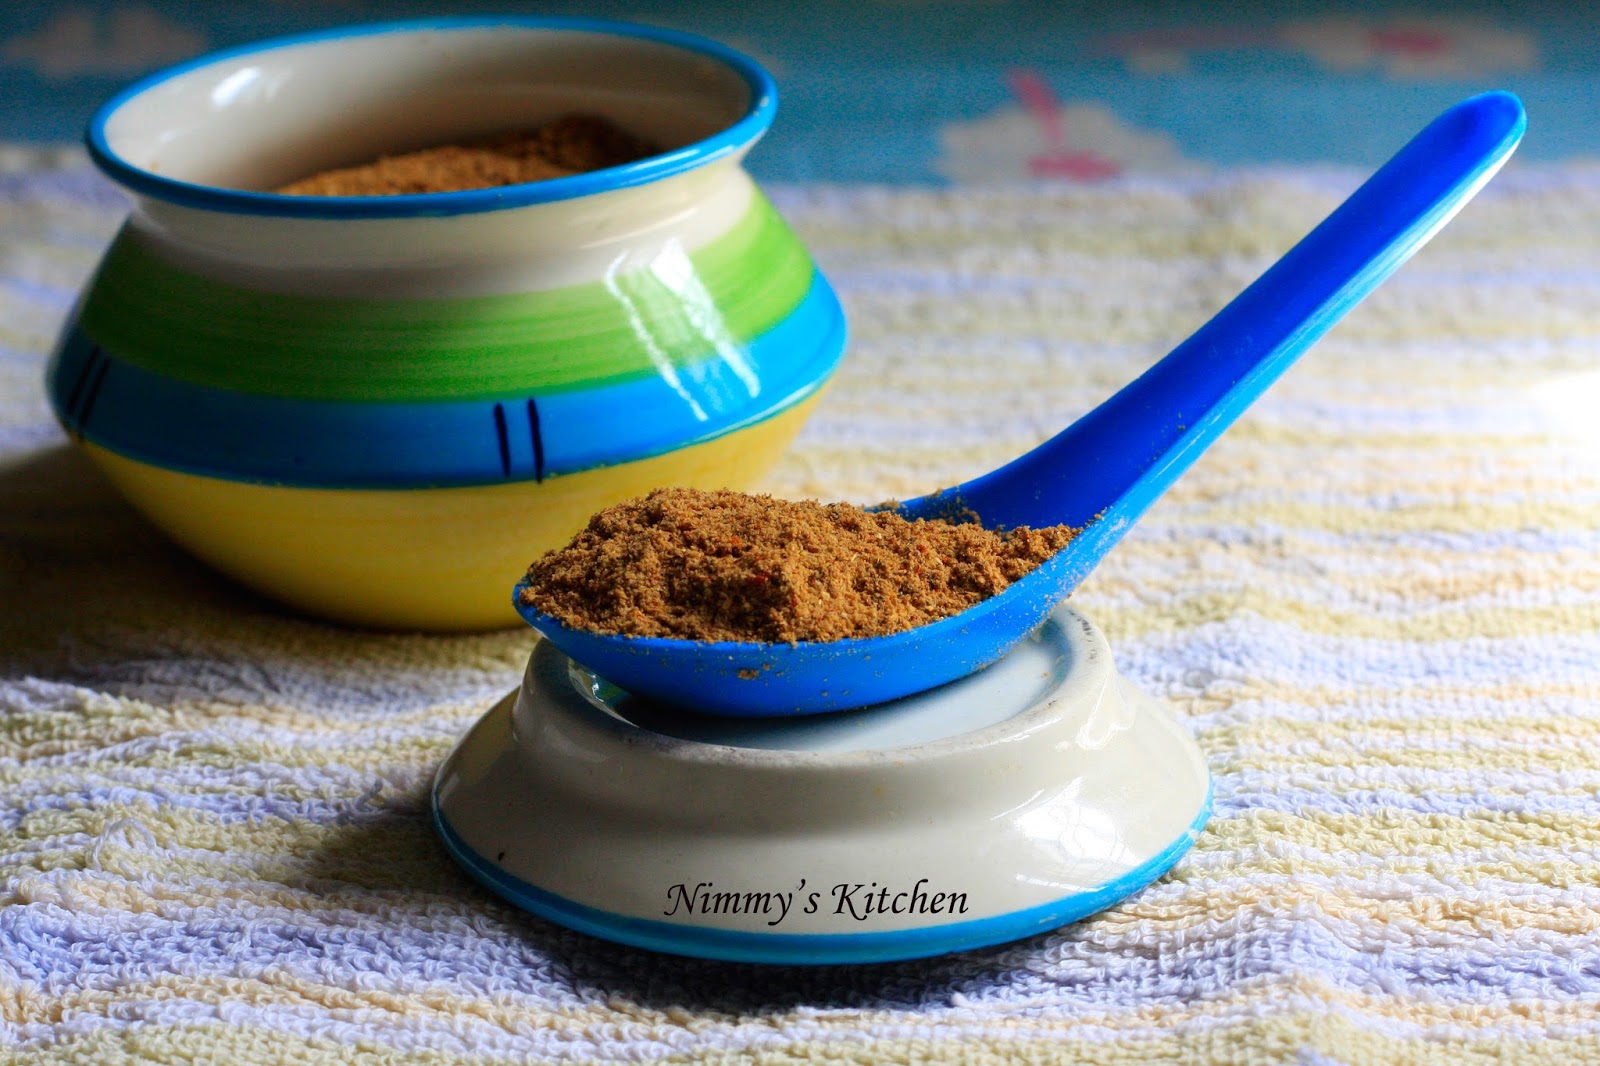
Homemade Rasam Powder


I have tried making rasam using the store bought rasam powder, but always it was a flop. Changed many brands, still couldn't make a good tasting rasam. Now, i stopped trying my luck with store bought rasam powder.


I don't make rasam much, but still whenever i make, i used to prepare only one type of rasam (not using rasam powder) which has a nice aromatic flavour and taste.


Recently, browsing through Sharmis blog, i found out a recipe for homemade rasam powder. Thought to give it a try and YES!!! that's it....the rasam which i made with this powder tasted awesome. We all loved it a lot. 


So all friends out there, who would like to make a good tasting rasam, try out using this homemade rasam powder. Make once and store it. You can use it whenever you like.


Recipe Source: Sharmispassions

Ingredients

1 and 1/2 cup Coriander seeds
1/2 cup Toor dal
1/2 cup Jeera/Cumin seeds
1/2 cup Black peppercorns
1/2 cup Dry red chilli


Method

  • Dry roast toor dal and dry red chilli. When it changes its colour and a nice aroma comes out from it, transfer it into a plate and set aside to cool.
  • Similarly, dry roast coriander seeds, black peppercorns, cumin seeds till it changes colour and aroma comes out from it. Transfer it to the plate to cool down.
  • When all the roasted ingredients are cooled completely, grind them together into a semi-fine powder.
  • Cool the mixture and transfer it into an airtight container.
  • Use the powder whenever you make rasam.

Note:
  1. The ingredients should be cooled down completely before grinding.
  2. This rasam powder can be added in any dishes if you like the taste of this masala.
  3. Always store it in an airtight container and use dry spoon.
  4. This homemade powder has a shelf life of 6 - 7 months.
  5. I took half of the quantity of the ingredients mentioned above, because we make rasam very rare. 


Thanks for visiting
Happy Cooking!!

Thursday, 6 June 2013

Homemade Ghee


This is the perfect recipe for making a homemade ghee. I have seen people melting the store bought butter to make ghee (a type of clarified butter). But i don't find this effective as its not homemade ghee, we are just melting the store bought butter.


From long back(since my childhood), i have seen my amma (mother) making fresh and perfect homemade ghee. Even now, she makes it a point to send me bottles of this ghee for my kids. I just love the taste of this ghee as it is very pure and fresh.

I used to enjoy this homemade ghee, but never thought to learn how to make it. In this vacation, when i went to stay with my parents, i made a point to learn some good recipes from her....in which this is one of them. I thought to share this recipe with you all guys, so that you can also make the complete use of it.


Ingredients

3 cups Milk cream
1 - 2 tbsp Curd
3 - 5 Drumstick leaves (optional)
3 - 5 Methi seeds
2 - 3 cups Cold water


Method
  • Take the milk cream that settles on the top of the milk, once it is boiled and cooled down.
  • Store it in an airtight container.
  • Keep this in the freezer. When the milk cream accumulates to 3 cups, take it from the freezer and keep it in the fridge for 1 day.
  • In the evening, take it out from the fridge and mix the curd in it. Keep it out in the kitchen counter.
  • Next day morning, whip it by adding 2 - 3 cups of cold water in a blender. You can see that some cream like substance floating on the top.  (Check the first picture)
  • Take that out and place it in a non stick pan or kadai. Discard the water that is left in the blender.
  • Pour some cold water, little by little in the kadai in which you have kept the cream and clean it.
  • Later, place the kadai on the stove and keep it on low flame.
  • The cream will start melting. Now add drumstick leaves and methi seeds in it.
  • Let it simmer for sometime.
  • You can see some grainy thing settling on the bottom.
  • When it becomes light brown, turn off the heat and let it cool for sometime. Don't over cook as the ghee will burn.
  • When it is still warm, strain it and pour it in an airtight container. This is the fresh and homemade ghee that you can use for various purposes.
  • When it is cooled completely, close the lid and store.


NB: I have tried to explain the method in simple English. If it is not clear, please feel free to put in a comment, so that i can help you further. If possible i will try to post a video the next time i make this. As of now, please check the pictures...


The cream like substance obtained after whipping in the blender. Transferred it into the kadai.


Heat on and the cream starts melting.


Melting....


Melting.....


You can see the grainy thing settling down...


When the ghee is still warm, pour it in an airtight container for storing.


The end product after cooling...the ghee is thickened and now ready to be used...


Thanks for visiting
Happy Cooking!!

Friday, 19 April 2013

Instant Homemade Pizza Base


This is a simple and easy to make pizza base, when you don't have enough time to make a yeast based pizza dough (traditional one).


Ingredients

1 1/2 cup Maida/All purpose flour
3 tsp Baking powder
1 cup Yogurt
Salt to taste


Method

  • Mix all the ingredients together and knead into a smooth and soft dough. 
  • If needed add extra maida, little by little and knead well for about 8 - 10 minutes.
  • The pizza base is ready... Isn't it easy?
  • Add toppings of your choice, bake it and serve hot.


Notes:
  1. You can use self raising flour instead of maida or all purpose flour.
  2. If you are using self raising flour, omit baking powder from the ingredients mentioned above.


Look at the Pizza Base, Doesn't it look soft and spongy?


Thanks for visiting
Happy Cooking!!

Homemade Pizza sauce


This is a simple recipe to make your own pizza sauce with the ingredients easily available at home. Try it out and you will not buy it from the stores the next time...


Ingredients

Olive oil - 2 tbsp
Onion (chopped) - 1 medium
Tomato (chopped) - 1 and 1/2 cup
Tomato puree - 1/2 cup
Garlic (chopped) - 8 cloves
Black pepper (crushed) - 1/2 tsp
Oregano powder - 1 tsp
Salt to taste


Method
  • Heat olive oil in a pan and add onion, garlic and chopped tomato. Saute it for sometime.
  • Add tomato puree, salt and crushed pepper and stir for sometime.
  • After 5 to 10 minutes, when the sauce thickens to the consistency required add oregano powder. Stir and take off from heat.

*forgot to take a snap. Will upload the picture later*


* I usually take the quantity of the ingredients as per my taste. So you can always adjust the spices as per yours*


Thanks for visiting
Happy Cooking!!

Thursday, 11 April 2013

Homemade Cream Cheese


This is a simple and easy recipe for cream cheese. Recently, when i was in need of some cream cheese, it was very difficult to get one in any stores. And when i found one, it was costing really high for a small packet. 

That's how i started searching in Internet - how to make a homemade cream cheese. Found out many recipes, but couldn't find a simple and easy one. By combining 2 or more recipes and omitting the difficult ingredients and adding simple easy available ingredients, i came up with this recipe. It tasted really great.

As i said it is very easy to make and you can use it as a spread on toasts, add different flavours to it or even make a homely cheesecake...Isn't it great?

With the ingredients mentioned below, i could make 1 cup of cream cheese. So if you want to make more, double the ingredients. Except muslin cloth ;)


Ingredients

1 litre Milk
2 tbsp Vinegar or Lime juice or 1 1/2 tsp Citric acid
3 tbsp Fresh Cream
Muslin cloth


Method

  • Boil milk by adding vinegar.
  • Keep stirring continuously till you can see the whey separated from the milk ie. you can see water and milk solids separately. 
  • Switch off the heat and let it cool for sometime.
  • When it is still warm, pass it through a muslin cloth and hang it on a kitchen counter. Don't squeeze the water. 
  • Let it hang there for about 15 - 20 minutes.
  • This is actually what we call as Paneer.
  • Put this in a mixer and blend well into a soft and smooth paste.
  • Add the fresh cream and again blend it.
  • The cream cheese is ready.


Thanks for visiting
Happy Cooking!!


Tuesday, 11 September 2012

Homemade Cappuccino


This recipe is for all the coffee lovers......

The smell of coffee itself is awesome. Iam a coffee lover. But has never thought of buying a coffee maker. Recently, on a cookery show, i saw how to make this cappuccino. I was impressed and thought to try it by myself. It really tasted awesome. It has a soft, smooth, frothy texture that you don't need a coffee maker for making it.

The only difficult part in making this coffee is the 'mixing'. But friends, it is worth it. When you have that first sip....you will forget everything.


Ingredients

Instant coffee powder - 2 tsp
Sugar - 2 tbsp
Milk - 2 cups
Water - 4 tsp

Method
  • In a cup, put instant coffee powder, sugar and hot water. Mix well.
  • Mix it approximately for 10 minutes with a spoon till you get a smooth paste like consistency. (picture is shown)
  • Take the desired amount of this paste in a serving cup. Pour hot milk about 30 cm away from the cup. Mix well with a spoon.
  • Serve it hot.

First Stage


2nd stage


3rd Stage


4th Stage


5th Stage

You can see that the mixture doubles the quantity that you had initially taken.


Have this cup of Cappuccino...


Thanks for visiting
Happy Cooking!!

Thanks for visiting
Happy Cooking!!