Good News for people residing in Hyderabad......Click on "Homemade Chocolates & Cakes" (above) to know more.......Do join my FB page ( https://www.facebook.com/Chocofantasy) to get new updates.
A simple and easy cupcake with the flavour of coconut. These cuties are very soft and spongy. If you would like to dress up these cuties, you can put butter cream icing on top of them with a light drizzle of desiccated coconut.
By now, you might have come to know that i am a big fan of Chinese cuisine. Not only me, my daughter also love it a lot. So every now and then i try to make a Chinese dish.
I was lazily searching in the net for a recipe with potatoes . I was not at all in a mood to prepare anything. But when i saw this recipe from Sanjeev kapoor's Kitchen, i was boosted up. Yea!! sometimes it happens with me. I just get the energy instantly and without a second thought rushed into my kitchen and there you go....i started my cutting and chopping ;)
This dish is actually very spicy, but we don't eat much spicy food, so i added less spice as per our taste.
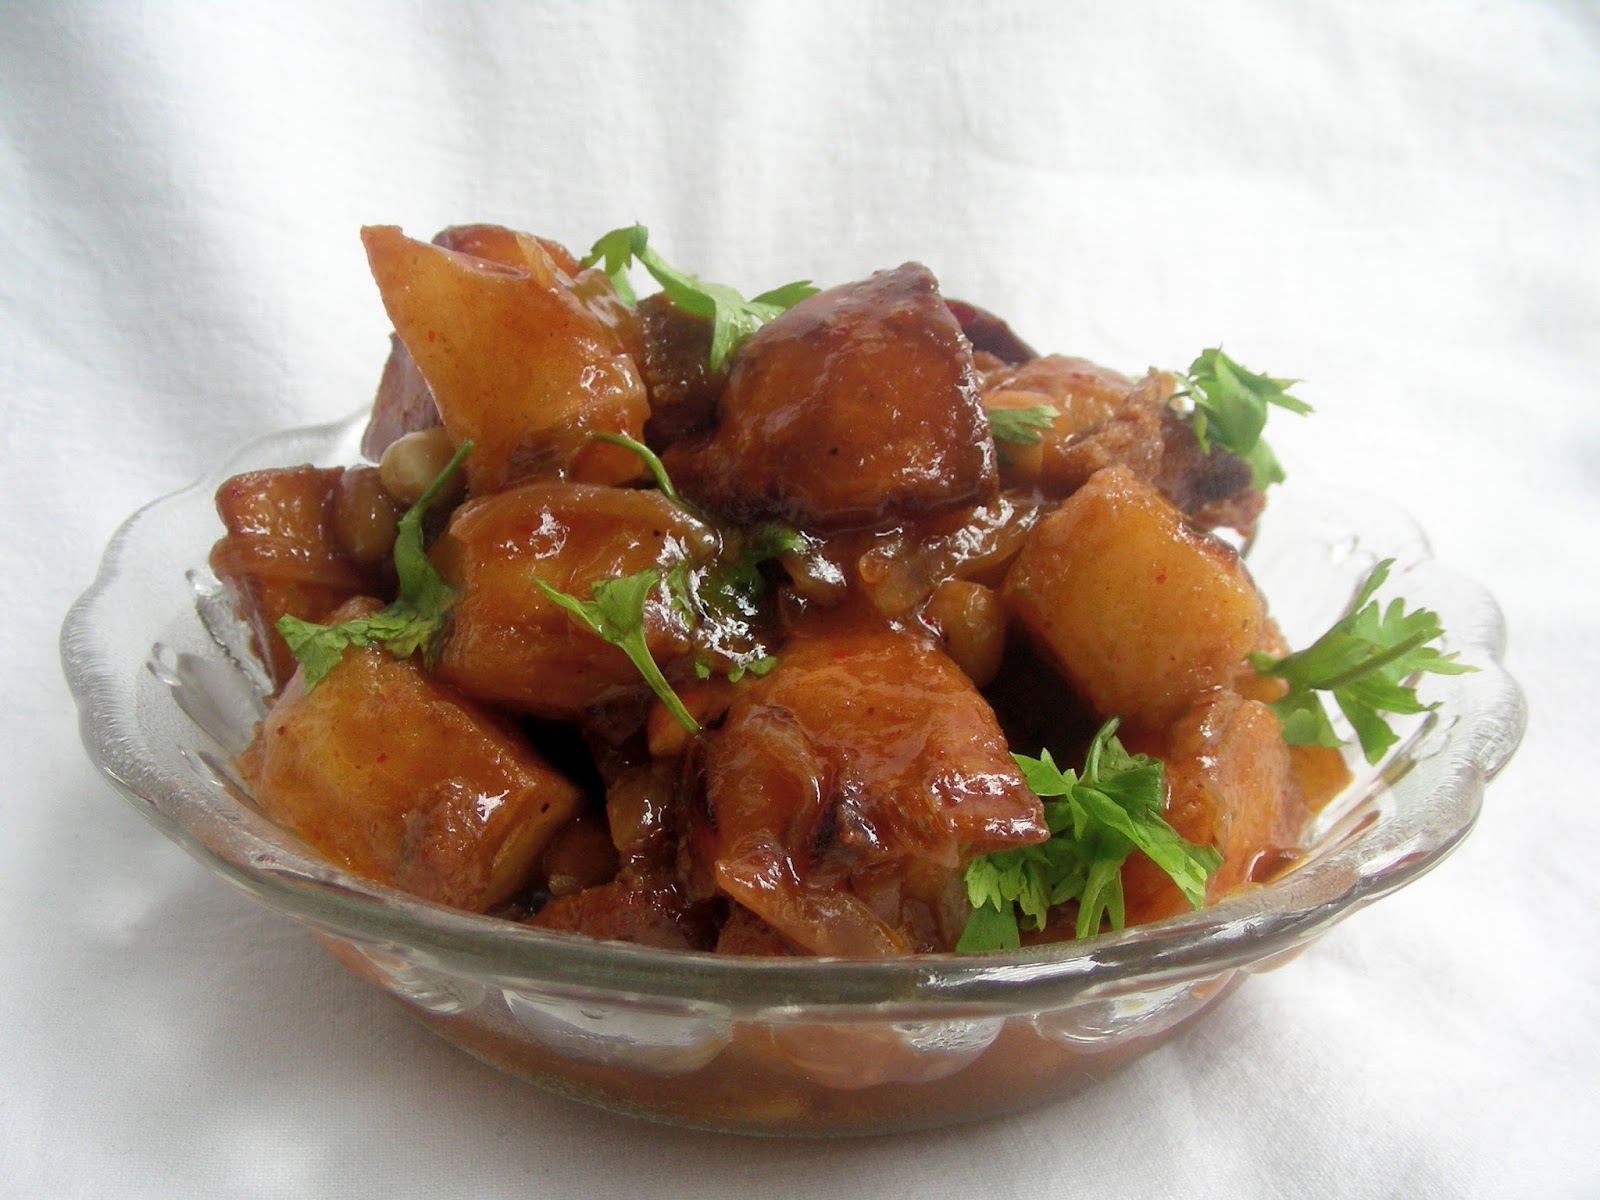
When i thought of making this dish, i had everything in my kitchen, except spring onion and chilli oil. So i replaced spring onion with onion and coriander leaves. Also replaced chilli oil with vegetable oil + 1/2 tsp Kashmiri red chilli powder. Take my word, the dish was just awesome. I served it with a simple and flavourful vegetable pulav (will post the recipe soon) and we all loved it a lot. If you love potatoes and Chinese cuisine, you will definitely love this dish. The potatoes are crispy and the juicy sauce adds to its taste. I can't put down in words how it tastes....you got to try it out...and do let me know..
Recipe source : Sanjeev Kapoor's Kitchen Ingredients 6 Spring Onion bulbs (sliced) 4 tbsp Oil 4 Potatoes (boiled and peeled, cut into big cubes) 1 inch Ginger (finely chopped) 5 cloves Garlic (finely chopped) 2 tbsp Chilli oil (or vegetable oil + 1/2 tsp Kashmiri Red Chilli powder) 2 tsp Cornflour 1 1/4 cup Vegetable stock 3 - 4 Dry red chilli (cut into pieces) 2 tbsp Soy sauce 1 tbsp Red chilli sauce 2 tsp Sugar Salt to taste 1/4 cup Peanuts (roasted and skin off) 2 stalks Spring onion greens Method
Heat oil in a kadai and put the potatoes in it. Fry them in batches, till they turn golden brown colour. Once done, transfer them on to a tissue paper and keep aside.
Take cornflour in a bowl and add 1/4 cup of vegetable stock. Mix well and keep aside.
In the meantime, heat chilli oil in another kadai. Add dry red chilli. Saute for a minute.
Now add onion, ginger and garlic. Saute till the onion becomes soft and translucent.
Add soy sauce, red chilli sauce, sugar and salt. Mix well.
Now add roasted peanuts and the rest of the vegetable stock. Mix well and let it cook for a minute.
Now add cornflour mixture and keep stirring for a minute.
Add fried potatoes and mix gently.
Garnish with spring onion greens and serve it hot with roti, vegetable pulav, fried rice or noodles.
Notes:
When you boil potatoes, make sure that they are not fully cooked or else it will break while frying.
If you don't have spring onion, you may prepare the dish using onion and for garnish use coriander leaves, even though it is not the authentic way of preparing a Chinese dish. But still it will taste good.
For Chinese dishes, do the preparation first and then start cooking as it is done very fast on high heat.
* I usually take the quantity of the ingredients as per my taste. So you can always adjust the spices as per your taste*
This can be served as a snack or a sweet. It is mostly enjoyed by kids. A great way to make them eat banana, dry fruits and nuts. This dish is made using ripe plantains (widely found in Kerala). The raw plantains are used to make banana chips which is popular in Kerala.
Cut the plantains into half, horizontally and put it in a steamer. Steam it till cooked.
Once done, take off from the steamer and keep aside to cool.
In the mean time, prepare the filling. In a non stick pan, dry roast chopped cashew nuts, almonds, raisins, dates, figs, poppy seeds and grated coconut.
When the coconut turns its colour slightly, and a nice aroma comes out, take off from heat and keep aside to cool.
Mash the plantains nicely.
Take a small ball from the mashed plantain and gently spread it on your palm.
Place a small spoonful of the filling and gently bring together all the edges of the plantain and roll it into any shape of your choice.
Do the same procedure for the rest of the mashed plantains.
Heat oil in a kadai.
Put the stuffed banana fritters in the hot oil and let it cook till all the sides are golden brown colour.
Once done, take off from oil and transfer them on to a kitchen towel.
Serve it hot.
Note:
You can shallow fry the stuffed banana fritters/Unnakkaya in less oil also.
Instead of honey, you can add sugar.
Any dry fruits or nuts like figs, walnuts etc..can be included in the stuffing.
The banana used for this dish should not be too ripe, or else it will be difficult to stuff the filling in it.
If some of the filling is left, just sprinkle them on the top of the fritters while serving.
Thanks for visiting
Happy Cooking!!
Sending this to Guru's Cooking Kids Special Giveaway
This is a savoury dish perfect for breakfast or as a snack. This is a healthy dish and enjoyed both by kids and adults. It is slightly crispy outside and soft inside with the flavour of curry leaves and onion.
I always have a stock of idli batter in my fridge. So whenever we are in a mood of eating paniyaram, i quickly make it as it is very easy to prepare. I have a non stick paniyaram vessel, so i use very little oil. I add more onion, as we love to get more of its taste in every bite. This is one of our favourite snack and last time when i made it, we enjoyed them with turai / ridge gourd chutney.
This is a special chutney from Andhra Pradesh. The speciality is that we use the skin of ridge gourd for making the chutney. It tastes good with steamed rice. The spicy and tangy taste of this chutney is really mouthwatering. Turai or Ridge gourd was a new vegetable for me when i first saw in the shops here in Hyderabad. I have not seen it before in Kerala. I tried to make a simple curry using this vegetable, but was not liked by anybody. So i never thought of buying this vegetable anymore. Later on when i heard that there is a special chutney made using the peeled skin of ridge gourd...i was surprised...Was double minded, should i try or not try? Anyway went ahead and tried this chutney. We all liked the chutney, but was not a hit with steamed rice. I had made some paniyaram and we all liked to have this spicy, tangy chutney with them.
Ingredients 2 Ridge gourd/Turai 2 tbsp Oil 1/2 tsp Mustard seeds 8 Curry leaves 1 Onion (medium, chopped) 2 Green chilli Salt to taste 2 tbsp Chana Dal (roasted) 1 tsp Tamarind pulp Method
Peel off the skin of the ridge gourds. Roughly chop and keep aside.
Take 1 and 1/2 of the peeled ridge gourd and cut it into small pieces. (Rest of the ridge gourd can be used for making different side dishes)
Heat oil in a kadai. Add mustard seeds and when it splutters, add curry leaves and green chilli.
Saute for a minute and now add the onion. When the onion turns translucent, add the roasted chana dal.
Mix well. When onion turns golden brown, add the chopped ridge gourd and the peeled skin of the ridge gourd.
Add salt and saute well till the ridge gourd is completely cooked.
After it is thoroughly cooked, add tamarind pulp. Mix well and take off from heat. Let it cool.
Now grind the mixture by adding very little water (if needed).
Serve it along with steamed rice or with paniyaram.
* I usually take the quantity of the ingredients as per my taste. So you can always adjust the spices as per your taste*
Once when we had visited a shop, where we had tasted Khasta Kachori and we all liked it a lot. I wanted to try them at home, so I searched in the net and finally got a recipe from Manjula's Kitchen. It was simple and I thought why not try it right away and yes...I was ready in my kitchen with my apron on ;)
My elder daughter was happy to assist me in the kitchen and she asked me why can't I take a video on the recipe. Even though many of my friends and viewers have asked me to take videos on my recipes, always I rejected with kind words saying that I am not good at it. When my daughter insisted that she will take the video, I gave up and that's how this video came up. It was taken in my mobile, so please bear with me as it is not clear.
Oh..I forgot...
This is my 300th post...When i look back, the day i started writing the blog, i feel proud that i have come this far and i definitely see some improvement in the terms of food photography, trying out varieties of dishes and a small step into the world of videos. I am not sure whether i will be doing more videos or not, but i am happy that i tried a hand on this too....
Recipe Source : ManjulasKitchen
Ingredients
For the dough:
1 cup Maida/All purpose flour 2 tbsp Oil 1/2 tsp Salt or to taste 1/4 cup Cold water
For filling:
1/4 cup Moong dal 1 tsp fennel seed powder 1 tsp Coriander powder 1 tsp Chilli flakes 1/2 tsp Amchur powder or Dry mango powder 1/4 tsp Ginger powder 1 pinch Asafoetida Salt to taste 1 tbsp oil 1 1/2 tsp Water
Oil for frying
Method
In a bowl, add maida, oil, salt and cold water (little by little) and knead it into a soft dough.
Keep this aside for about 15 minutes.
In the meantime, to make the filling, grind the moong dal into powder.
Put this in a bowl. To it, add fennel seed powder, coriander powder, chilli flakes, amchur powder, ginger powder, salt, oil and asafoetida. Mix well.
Take a non stick kadai and roast this mixture for about 3 minutes, till the raw smell goes off. Once done, transfer it into a bowl and keep aside to cool.
Add water and keep aside for 3 - 4 minutes so that it will absorb the water.
In the mean time, divide the dough into small balls.
Take one ball in your hand and press with your fingers to flatten it a bit. Be sure that the sides are thinner than the center part. (Check the video given below)
Place the flattened dough in your palm and put little filling in the center. Bring all the sides together, seal it and form a ball.
Do the same procedure with the rest of the dough balls. Let them be kept aside for 3 - 4 minutes.
Heat oil in a kadai.
In the mean time, we have to roll the dough balls which we have filled and kept aside.
No need to use a rolling pin to flatten them. Just use your palm, press them lightly and flatten it. (Check the video given below)
Do the same procedure with all the filled dough balls.
When the oil is hot, put the kachoris in it and fry them till both the sides are golden brown colour.
Once done, take off from the oil and transfer them on to a tissue paper.
Serve it hot with any chutney of your choice or enjoy them as it is...
Note:
To check whether the oil is hot, just put a small pinch of dough in the oil. If it comes up slowly, then it is the right time to fry the kachoris.
Here's the video....Please bear with me...its not that clear..... :)
Hope you liked it.....
* I usually take the quantity of the ingredients as per my taste. So you can always adjust the spices as per your taste*
This is an egg less, butter less and healthy treat for your family. These muffins are absolutely healthy as bananas, oats and wheat flour are used.
My favourite Lazy Cake is a big hit in our family. It is a sure shot cake recipe and my first baked cake. Even that cake is made with banana.
I always wanted to try out muffins and due to some reason or the other, i usually end up making cup cakes or cakes. So this time, i made up my mind and successfully baked these healthy goodness.
These muffins can be packed as a snack for your kids and i am sure they would love it, as my daughters did. They are packed with the goodness of bananas (gives us energy), oats (gives fibre) and more over i included whole wheat flour also. Isn't it great...A perfect start for a beautiful day!!
Enjoy making them and of course munching on these goodness....
Ingredients 1 cup Whole Wheat flour 1 cup Maida/All purpose flour 1/2 cup Sugar 1/2 cup Oats 3/4 tsp Baking Powder 3/4 tsp Baking Soda 1/4 tsp Salt 3/4 cup Chocolate Chips 1/3 cup Canola oil or Vegetable oil 3 Banana (ripe)
Method
Mash the banana's into a smooth paste. You can either use a potato masher or electric beater or just your hands.
Add oil and sugar into it. Use an electric beater and beat them till the sugar is completely dissolved and everything is combined properly.
Pre-heat oven in convection mode at 200 degree Celsius.
In another bowl, mix whole wheat flour, maida, salt, oats, baking powder and baking soda.
Put this flour mixture into the banana mix slowly. Mix well using a wooden spoon.
Add the chocolate chips into the batter and mix nicely. If you feel that the batter is bit thick, add in little milk.
The batter will not look like the normal cake or cup cake batter. The muffin batter will be little thick. So not to worry.
Spoon the batter into the muffin cup about 3/4th full.
Keep the tray in the preheated oven for about 18 to 20 minutes.
Once done, take off from the oven and let it cool in a wire rack.
Enjoy these yummy and healthy treats !!!
Note:
Sprinkle little chocolate chips in the top of each muffins before placing them in the oven.
You can make the muffins by using only maida. For a bit of healthy twist, i halved the quantity of maida in the recipe.
You can increase the amount of sugar, if you feel that the banana that you are adding is not very sweet.
I have made many dishes with fresh green peas or the frozen ones, but was new to dry peas and usually made Ragda Pattice with them "'which is huge hit in my family'" thinking that this is the only dish i can make with them. I have even made samosa ragda with them which also turned out to be a hit.
But one day, i thought why not give it a try and make something different with these dry peas and that's how i ended up making this side dish and even this has become one of our favourite. We love to have it with roti. Check out this simple and tasty side dish with very simple ingredients that can be found in your pantry.
Ivy gourd is known in different names like Kovaikkai, tindora etc. It has many medicinal values and is very good for our body. Try this simple and easy side dish which can be served with steamed rice.
Ingredients 200 gms Kovaikkai (cut into small roundels, comes around 2 to 3 cups when cut into roundels) 1 Onion (large, finely chopped) 10 Curry leaves 1 tsp Mustard seeds 3 - 4 Green chilli (slit into half) 5 - 6 tbsp Oil (preferably coconut oil) 1 tsp Kashmiri red chilli powder 1 tsp Turmeric powder Salt to taste Method
In a bowl, put the kovaikkai roundels, onion, curry leaves, kashmiri red chilli powder and turmeric powder. Keep this aside.
Heat oil in a non stick pan. Add mustard seeds and when it starts to splutter, add green chillies.
Add the kovaikkai mixture (kept in the bowl) and salt. Mix well.
Cover and let it simmer till the kovaikkai is completely cooked.
Once it is cooked, take off the lid and again stir fry till they slightly changes its colour.
Take off from heat and serve it hot with steamed rice.
Note:
Adding green chilli is optional, you can omit them and add increase the quantity of red chilli powder.
* I usually take the quantity of the ingredients as per my taste. So you can always adjust the spices as per your taste*
These buns can be considered as a complete meal. I made these buns with an egg masala stuffing. You can make these buns with your own stuffings like chicken masala, mutton masala or mixed vegetable masala.
When i baked these buns, the fresh aroma filled my home, felt like i have entered a bakery. I surprised my daughter with these mini buns when she returned home from school. Both my kids loved them a lot. The tasty stuffing enhanced the flavour of the buns that in one bite itself you can enjoy the softness of the buns and also the spicy yummy filling.
Ingredients For the dough: 2 cups Maida/All purpose flour 1 tsp Dry yeast 3/4 cup Milk 1 Egg 8 gm Sugar 2 gm Salt 2 tsp Butter 2 tbsp Luke warm water For Stuffing: 4 Eggs 2 Onion (medium, finely chopped) 2 Tomato (medium, Finely chopped) 1 tsp Jeera/Cumin seeds Salt to taste 2 - 3 tbsp Kashmiri red chilli powder 1 tsp Turmeric powder 3 tbsp Oil
Method for making the Egg stuffing:
Heat oil in a non stick pan. Add jeera and when it splutter, add onion.
Saute till the onion turns translucent. Now add tomato.
Let it simmer till the tomato is nicely cooked and the mixture turns soft and mushy.
Now add salt, kashmiri red chilli powder and turmeric powder.
Mix well and let it simmer till everything is combined properly.
Now add the eggs and mix nicely.
Let it simmer for sometime. Keep stirring till the eggs are completely cooked and nicely scrambled.
Take off from heat and let it cool.
Method for making the stuffed buns:
In a small bowl, put luke warm water. Add little sugar and dry yeast in it. Mix well and keep this aside for the yeast to develop.
In a big bowl, put maida and add the developed dry yeast into it. Give it a mix.
Now add egg and mix again slightly.
Add salt and the rest of the sugar. Mix.
Now add milk, little by little and knead it into a dough.
After 5 minutes, add the melted butter and knead again for about 10 minutes.
The dough should become smooth and soft. Cover it with a cloth in a bowl and keep this in a warm place for about 1 - 2 hours, till it rises double.
Once it is doubled, punch with your knuckles and knead again for about 2 - 3 minutes.
Divide the dough equally into medium sized balls.
Take one ball and flatten it on your palm with your fingers.
Fill the egg stuffing in it and carefully bring all the edges together and close it. Roll it into a ball again in your palm and place it in a greased baking tray.
Do the same procedure with the rest of the dough.
Give enough space in between all the balls, so that it won't stick together.
Keep this aside covered with a cloth for about 20 - 30 minutes so that they will rise a little.
Preheat oven in convection mode at 200 degree Celsius.
Once they have risen, give an egg wash on top of each buns.
Sprinkle little sesame seeds on top of each buns.
Place the baking tray in the preheated oven for about 15 - 20 minutes or till they become golden brown colour.
Once done, take off from the oven and let it cool a bit.