Homemade Chocolate

Good News for people residing in Hyderabad......Click on "Homemade Chocolates & Cakes" (above) to know more.......Do join my FB page ( https://www.facebook.com/Chocofantasy) to get new updates.


Showing posts with label Veg. Show all posts

Saturday, 28 March 2020

Easy Homemade Bread

Blogging after a long long time...

Had been busy with my family and business, that i was finding very less time to write a blog post.

You all are aware that we are going through a tough situation now. Because of this critical situation, we all are forced to stay home. Some of you might be utilising this time to spend with your family, while some others might be feeling depressed. Whatever it is, please stay home and stay safe. Social distancing is very much needed. We can overcome this situation together, by staying separate.

Take this opportunity to brush up your hobbies, spend time with your family and learn new things.

To ease your boredom, i thought to write down an easy bread recipe, so that u can try at home and feed your family. This simple recipe doesn't have lot of ingredients, so as we have very limited resources now because of the lock down, we can try this one out. Baking is a stress buster, bread making is even more relaxing. Moreover, this will give your hands some workout 😊


Lets get into the recipe...

Ingredients

All Purpose Flour/ Maida - 225 gm (1 1/2 cup)
Warm Milk - 165 ml 
Yeast -1 tsp ( or 1 1/2 tsp of normal yeast)
Salt - 1/2 tsp
Milk Powder - 2 tbsp
Sugar - 2 tbsp
Butter (room temperature, not melted) - 1 tbsp

Method

  • Take a big bowl. Pour warm milk into it. Add 1 tbsp sugar and instant yeast into it. Mix well and keep it aside for 10 mins. This will bubble up a bit.
  • Now, add milk powder, salt and the remaining sugar. Mix well.
  • Now add maida, little by little, mixing in between, using a spoon. Use your hand towards the end to mix properly. It will be sticky. Mix for 2-3 mins. Cover and keep it aside for 10 mins.
  • After 10 mins, add butter, mix well and take this slightly sticky dough out onto a clean surface.
  • Now, you have to knead well by stretching and kneading method for minimum 15 mins. If you find that its sticking to your surface or hands, add little bit of maida, 1 tbsp at a time. Don't add too much of maida at this time, or your bread will become hard. (see video to see stretching and kneading)
  • Don't skip this step. Kneading is the key to a soft and tasty bread. This activates gluten which is very crucial in bread making.
  • After kneading for 15 mins, your dough will be very soft and not sticky. 
  • Now grease a bowl with little oil and place this dough into it. Cover and keep it in a warm place for 1 hour or till it becomes double in size.
  • Once its double, take it out onto a clean surface. Dust little bit of maida and just knead for 1 min. We just want to knock out the air trapped in the dough.
  • Take a rolling pin and roll the dough till it spreads nicely. Now, from one end, start rolling inwards tightly. Pinch the dough when it reaches the end. Tuck in the sides too. The dough will look like a log now. (see video for reference)
  • Place this log into a greased loaf tin, pinched portion downwards. Cover with a damp cloth and keep it in a warm place for 1 hour.
  • After 1 hour, when the dough rises, place it in a preheated oven at 160 degree Celsius for 40-50 mins till its brown on the top and cooked completely. When u hear a hollow sound on knocking on the top of the bread, then u can make out that its cooked completely.
  • Every oven temperature is different, so bake according to your oven.
  • Once its baked, take out and place the tin on a wired rack for 5 mins. Smear some butter on top of the bread.
  • After 5 mins, overturn the tin and take out the bread and let it cool down completely. Don't let the bread cool down completely in the tin itself as it will become soggy.
  • Slice the bread only after it is completely cool down.
  • Enjoy!!


Sunday, 21 February 2016

Hyderabadi Vegetable Dum Biriyani


This time its a rice dish that iam sharing. Everyone love biriyani. But have you tasted a Dum Biriyani?

Dum is the process of making biriyani. Hyderabadi Dum Biriyani is one of the famous among them.

Dont be alarmed by seeing the list of ingredients :) Iam sure all of them would be easily available in your pantry. Its a bit lengthy process but believe me, its worth it....

Hope you will love it. Do let me know how you liked the taste...

Ingredients

2 Onion (thinly sliced for deep frying)
½ cup Oil

For cooking rice:

1 ½ cup Basmati rice (soaked for 30 minutes)
2 Green Cardamoms
2 Black Cardamoms
2 Cloves
1 inch Cinnamon Stick
1 Bay leaf
2 Mace strands
3 cups Water
Salt to taste

For the Vegetable Gravy:

½ medium sized Cauliflower (cut into florets)
1 medium sized Carrot (cut into cubes)
1 medium sized potato (cut into cubes)
1 cup French Beans (cut into pieces)
½ cup Peas (optional)
2 medium sized Onion (thinly sliced)
1 Green chili (slit into half)
2 tbsp Ginger (julienned)
1 tbsp Garlic (finely chopped)
1 tsp Shah Jeera
2 Green Cardamoms
2 Black Cardamoms
2 Cloves
1 inch Cinnamon stick
1 Bay leaf
2 Mace strands
100 gms Curd (whisked)
¼ tsp Turmeric powder
½ tsp Red chili powder
2 tbsp Cashew nuts
1 tbsp Raisins
2 tbsp Almonds (sliced)
3 tbsp Ghee
Salt to taste
¾ cup water

Herbs for the assembling:

½ cup Coriander leaves (chopped)
½ cup Mint leaves
100 gms Curd (whisked)


Method

Wash basmati rice and soak it in water for about 30 minutes.

Heat oil in the a cooker for deep frying. Add the sliced onion in it and fry for 2 minutes or till it becomes golden brown colour. Transfer the fried onion onto a tissue paper and keep aside.

Put the soaked basmati rice along with 3 cups of water, salt, green cardamoms, black cardamoms, cloves, cinnamon, bay leaf and mace strands in a thick bottomed pan. Mix and keep it on high flame. When the water starts to boil, reduce it to low flame and cover it with a lid. Let it cook till the rice is half done. Transfer the rice on to a bowl and keep aside.

Heat ghee in a cooker and add shah jeera, green cardamoms, black cardamoms, cloves, cinnamon, bay leaf and mace strands. Saute for 1 minute and then add the sliced onion. When the onion starts to change its colour (it might take 2 minutes), add green chilli, ginger and garlic. Mix well and sauté for 1 minute. Now add turmeric powder and red chilli powder. Mix well. Add the vegetables and and sauté for 2 minutes. Adjust salt. Add curd and mix again. Pour 3/4th cup of water and mix well. When the water starts to bubble, reduce it to low flame and cover it with the lid. Let the vegetables cook for about 3 - 4 minutes. Now add the chopped almonds, cashew nuts and raisins. Let it cook uncovered for another 1 minute. Transfer the contents into a bowl and keep aside.

For assembling Dum biriyani:


Spread half of the vegetable gravy in the cooker. On top of it spread half of the cooked rice. Pour little curd on it. Spread little fried onion, coriander leaves and mint leaves on its top. Spread the remaining half of the vegetable gravy. On top of it spread the remaining cooked rice. Pour little curd, fried onion, coriander leaves and mint leaves. Place an aluminium foil on top of the cooker and place the lid on it to create the dum effect. Heat a tawa on high flame. When it becomes really hot, reduce the flame to low. Place the super cooker on the hot tawa for 25 minutes. Remove the lid and the aluminium foil and serve it hot.


* I usually take the quantity of the spices as per my taste. So you can always adjust it as per your taste*


Thanks for visiting
Happy Cooking!!


Tuesday, 24 February 2015

Dal Dhokli


This is a one pot meal and is a west indian dish. The soft dhokli in dal, gives a yummy taste with lot of flavours in it. Try it once and you will love it for sure.


Ingredients
 
½ cup Toor Dal (washed and soaked for 30 minutes)
2 tbsp Raw Peanuts
2 cups Water
Salt to taste
¼ tsp Turmeric powder
 
 
For Dhokli
 
1 cup Whole wheat flour
1 tbsp Besan flour
¼ tsp Ajwain
¼ tsp Turmeric powder
Salt to taste
½ tsp Red chilli powder
1 tbsp Oil
Water as required
 
 
For Seasoning
 
1 tbsp Oil
1 tsp Ghee
1 tsp Mustard seeds
1/8 tsp Methi seeds
½ tsp Cumin seed/Jeera
1 pinch Asafoetida
1 tsp Ginger (grated)
1 tsp Green chilli (finely chopped)
10 Curry leaves
¼ tsp Turmeric powder

 
For Garnishing
 
1 tbsp Lemon juice
1 Onion (medium, finely chopped)
2 tbsp Coriander leaves (finely chopped)


Method

  • Put toor dal, raw peanuts, water,  salt and turmeric powder in the pressure cooker and place it on high flame. Pressure cook till one whistle and then reduce to low flame till 4 whistles. Once done, take off from heat and when the steam completely escapes from the cooker, take off the lid. Transfer the dal into a bowl and whisk it using a whisker. Keep this aside.
  • For making dhokli, take a large bowl and add whole wheat flour, besan, salt, turmeric powder, red chilli powder, ajwain and oil. Mix well and add water little by little to make a stiff dough. Spread little oil on top of the dough, cover and keep this aside.
  • Heat oil and ghee in a kadai on medium flame. Add mustard seeds, methi seeds, jeera, ginger, green chilli, asafoetida, curry leaves and turmeric powder. When it splutters, add the cooked dal mixture into it. Keep it on high flame and add more water as required because this dish is very thin in consistency. Adjust salt if needed. Reduce the flame, when it starts to boil. Let it boil for 5 minutes.
  • In the meantime, take small portions of the dhokli dough and roll it thin just like we roll for chapathi. Cut it into diamond shapes using a knife. Do the same procedure to the remaining dough. Put the pieces one by one into the boiling dal. Mix gently and let it cook till the dhoklis are done or for 10 minutes.
  • Serve it hot by adding onion, coriander leaves and juice of lemon.


* I usually take the quantity of the ingredients as per my taste. So you can always adjust the spices as per your taste*


Thanks for visiting
Happy Cooking!!

Wednesday, 10 December 2014

Meetha Chawal


This is an easy sweet dish with loads of nuts and dry fruits. When you are in a mood to eat something sweet and at the same time lazy to prepare a full fledged sweet dish, this is the one you can indulge in. Kids would love it too.


Ingredients
 
1 cup Basmati Rice (soaked for 30 minutes)
¾ cup Sugar
¼ cup Mixed nuts and raisins (Almonds, Cashew nuts, Pistachios)
2 tbsp Ghee
2 Cloves
1 inch Cinnamon stick
3 Cardamoms
1 tsp Fennel seeds
2 cups water
3 tbsp Milk
1 pinch Saffron/Kesar (optional, instead you can add food colour)
3 tbsp Dry coconut powder
 
 
Method
  • Add saffron in the milk and keep this aside. If adding food colour, add food colour in the milk.
  • Heat ghee in a heavy bottomed deep pan. Add cloves, cinnamon, cardamoms and fennel seeds.
  • Saute till it starts to change its colour ie. for ½ a minute.
  • Now add the soaked and drained basmati rice. Saute for 1 minute.
  • Later, add water and saffron milk in it. Mix well and when the water starts to bubble, cover with a lid. Let it cook for 10 minutes.
  • Later, when the rice is half cooked, add sugar, chopped nuts and raisins. Mix well and add dry coconut powder also.
  • Cover again and let it cook for another 5 minutes.
  • Once done, serve it hot by garnishing with some chopped nuts, raisins and dry coconut powder.


Thanks for visiting
Happy Cooking!!

Thursday, 30 October 2014

Kashmiri Pulav


A tasty Pulav which has slight sweetness and lots of flavours in it. Fruits and nuts added in this pulav takes the entire dish to a totally another level.

When I thought to make this dish, I was wondering how the fruits added in it will complement the dish. But when everything came together, it amazingly complemented each other and it was YUM!!!

Try it out friends, its really different from our day to day normal pulav.


Ingredients

2 cups Basmati Rice (soaked for 30 minutes)
3 Cloves
1 Bay leaf
1 inch Cinnamon stick
2 tsp Fennel powder
1 tsp Dry ginger powder
3 Cardamoms
2 Black Cardamom
Salt to taste
3 tbsp Oil or Ghee
4 cups Water
1 pinch Saffron
 

1 Onion (large, thinly sliced)
3 tbsp Cashew nuts
3 tbsp Almonds
3 tbsp Raisins
½ cup Grapes
½ cup Pomegranate kernels
Oil for frying onion
Ghee for frying dry nuts and raisins


Method

  • Heat oil in a kadai and deep fry the onion till it becomes golden brown colour. Transfer it onto a tissue paper. Keep it aside.
  • Heat ghee in a kadai and fry nuts and raisins till golden colour. Once done, transfer them onto a plate. Keep aside.
  • Heat ghee or oil in a pressure cooker. Once it is hot, add cloves, green cardamom, black cardamom and bay leaf. When aroma comes out from it, add fennel powder and dry ginger powder. Mix well and add the soaked basmati rice. Saute for 1 minute and add saffron. Mix well.
  • Add water and salt. Mix well and when the water starts to bubble, keep it in low flame. Put the lid on with the whistle and let it cook for 10 minutes. Make sure that the cooker should not release any steam ie. it should not whistle.
  • Turn off the flame and allow the steam to escape on its own.
  • Take off the lid and puff up the rice. Add the fried nuts and raisins. Mix gently and serve it hot by garnishing with sliced grapes, pomegranate kernels and fried onion.


* I usually take the quantity of the ingredients as per my taste. So you can always adjust the spices as per your taste*


Thanks for visiting
Happy Cooking!!

Thursday, 18 September 2014

Homemade Khoya/Mawa


Khoya/Mawa is used as the base for a wide variety of indian sweets. Khoya is made by simmering full-fat milk in a heavy bottomed vessel for a long time, till it becomes thick. They are used in gravies too.


This time I used khoya for making mawa cup cake and it was yummy and delicious. You can click on the link to know the recipe for Mawa Cupcake


Ingredients
 
6 cups Full Cream Milk
 
 
Method
 
  • Pour the full cream milk in a heavy bottomed pan. Keep stirring in between and scrap out the sides.
  • Stir continuously and keep scraping the sides. Keep a close eye on the milk as it tends to burn in the bottom. Let the milk boil for 30 minutes. Now the milk will reduce to half the quantity.
  • After 15 minutes, the mixture will start to thicken. Keep stirring. At this stage, the mixture tends to burn easily, so keep stirring and scrap the sides constantly.
  • After 5 minutes, you can see that the mixture forms into a lump and comes off easily from the sides. At this stage, switch off the flame and let it cool down completely.
  • Once the khoya is cooled, it will become thicker. Khoya is used for making many indian sweets or you can even add it in curries.


Thanks for visiting
Happy Cooking!!

Friday, 12 September 2014

Whole Wheat Pasta in White Sauce


Pasta is a staple food in Italian cuisine. It comes in various sizes and shapes. Now-a-days, you get pasta made in whole wheat which is more healthier than the regular ones. Pasta is prepared in different types of sauces. The famous of them all is the white sauce. Though white sauce is not that healthy, it tastes amazing... very creamy...

Pasta is an all time favourite among kids and mine is not an exception. I always make whole wheat pasta in tomato gravy with variations. My elder daughter likes white sauce, so once in a while I prepare it to make her happy.

Try this easy recipe and let me know how you liked it.

 
Ingredients
 
3 cup Whole Wheat Pasta
1 Onion (large, finely chopped)
1 cup Carrot (grated)
10 nos French Beans (finely chopped)
3 tsp Black pepper powder
2 tsp Chilli flakes
1 tbsp Italian Spice Mix
3 tbsp Olive oil
Salt to taste
6 cups Water
 
 
For White Sauce
 
½ tbsp. Cornflour
½ tbsp. Maida/All purpose flour
4 tbsp Cheese (grated)
3 cup Milk
 
 
Method
 
  • Boil water in a kadai. Add salt in the water. When the water starts to bubble, add the pasta. Stir in between and let it cook for about 8 minutes or till the pasta is cooked Al dante. Strain the pasta and add little oil in it. Mix well and keep this aside.
  • In a small bowl, add cornflour, maida and milk. Mix well and keep this aside.
  • Heat olive oil in a kadai. Add onion and sauté for 1 minute or till it becomes soft.
  • Now add carrot and beans. Saute for about 2 – 3 minutes or till the vegetables are half cooked.
  • Keep on low flame and add the milk mixture into it. Add Italian spice mix, salt, chilli flakes and black pepper powder in it. Mix well.
  • After 1 minute, add grated cheese into it. Mix well. When the sauce starts to bubble, add the cooked pasta into it. Mix well.
  • Adjust the seasoning if required. (If the sauce is thickened, add milk as per your requirement) After 2 minutes, switch off the flame and serve it hot.


* I usually take the quantity of the ingredients as per my taste. So you can always adjust the spices as per your taste*


Thanks for visiting
Happy Cooking!!

Thursday, 11 September 2014

Banana Peanut Butter Milkshake


This is a healthy and yummy drink which gives instant energy. If you are not a fan of peanut butter, you can omit that. I am sure this milkshake would be loved by all kids. If needed, you can add a scoop of ice cream and it gives a creaminess to the drink. Do any additions to this drink and enjoy as per your taste.


Ingredients

2 Banana (large, roughly chopped)
1 tbsp. Peanut Butter
1 tbsp. Cocoa powder
3 tbsp. Sugar
3 cup Full Cream Milk (chilled)
Ice Cubes (optional)


Method
  • In a blender, add chopped banana, peanut butter, cocoa powder, sugar and 1 cup of milk.
  • Blend till everything is nicely incorporated.
  • Now add the rest of the milk and pulse for a second.
  • Add ice cubes if needed and serve it in tall glass.
  • Enjoy!!!


* I usually take the quantity of the ingredients as per my taste. So you can always adjust them as per your taste*


Thanks for visiting
Happy Cooking!!

Sunday, 31 August 2014

Kaalan


Kaalan is a thick preparation with curd and vegetables like yam and raw banana. It is a traditional Kerala dish served along with steamed rice and is one of the dish served in any Kerala Sadya/feast. This dish is sour in taste. A healthy and must try side dish.


Ingredients 

1 Raw Plantain/Pachakkaya (medium sized)
100 gm Yam/Chena
Salt to taste
1 tsp Turmeric powder
½ tsp Red chilli powder
2 cup Curd (sour, beaten) 

For making Black pepper water 

2 tbsp Black Peppercorns
¾ cup Water 

For Grinding 

1 cup Coconut (freshly grated)
3 – 4 Green chilli 

For tempering 

3 tbsp Coconut Oil
1 tsp Mustard seeds
2 Dry Red chilli
20 – 30 Curry Leaves

 
Method 

  • Wash and cut the raw plantain and yam in medium sized irregular square pieces.
  • Cook yam in 3 cups of water along with salt, in a Kadai, till it is slightly cooked.
  • Now add raw plantain in the kadai and let it cook for about another 20 minutes or till both the vegetables are nicely cooked, but not mushy.
  • If you want to add water while cooking, make sure to add hot water.
  •  In the meantime, grind coconut along with green chillies into a fine and smooth paste by adding very little water. Keep this aside.
  •  Grind black peppercorns coarsely and then add ¾ cup of water. Grind again and strain the mixture. Keep this black pepper water aside.
  • When the vegetables are cooked, add the beaten curd and black pepper water into it. Let it cook for 25 minutes or till the mixture is slightly thickened.
  • When it is thickened, add the ground coconut mixture into it. Let it cook for 3 minutes or till it bubbles a little. Adjust salt.
  • Switch off the flame and keep the kadai aside.
  • In a fry pan, put oil and add mustard seeds. When it splutter, add dry red chilli and curry leaves. Saute and pour it on top of the Kaalan.
  • Stir well and serve it with steamed rice.


* I usually take the quantity of the ingredients as per my taste. So you can always adjust the spices as per your taste*


Thanks for visiting
Happy Cooking!!

Thursday, 28 August 2014

Til Ladoo (with Jaggery)


Til Ladoo is a traditional maharastrian sweet made using til, jaggery and ghee. This is generally served in festivals. This is very healthy sweet, loved by both adults and kids. Try it out this Ganesh Chaturthi and Enjoy!!!


Ingredients 

2 cups Til
1 cup Jaggery
2 tsp Ghee
2 tbsp Cashew nuts and Almonds (optional)
½ tsp Cardamom powder
 

Method
 
  • Dry roast til in a kadai for about 5 minutes or till it start to change its colour. Once done, transfer it on to a plate.
  • Grind half of the roasted til, coarsely. Keep this aside.
  • In a kadai, heat ghee and add jaggery. When jaggery is completely melted, switch off the flame and let it cool down a bit.
  • Add the roasted til and the cashew nuts, almonds. Mix well and transfer the mixture onto a plate.
  • When the mixture is still warm, take small portions from the mixture and roll it between your palms to make ladoos.
  • Enjoy or store it in an airtight container for later use.


* I usually take the quantity of the ingredients as per my taste. So you can always adjust as per your taste*


Thanks for visiting
Happy Cooking!!


Wednesday, 27 August 2014

Aviyal (Mix vegetable in Curd)


Aviyal is a mix of different vegetables cooked in curd gravy, seasoned with coconut oil and curry leaves. This is an essential part of any Kerala Sadya/feast. This dish can be a semi-solid side dish or made into a gravy. This is a very healthy dish and is best enjoyed with steamed rice.

This side dish is very easy to prepare. The only hard part is the cutting of vegetables. But once it is done, you can prepare this dish within no time. A perfect combo of health and taste.


Ingredients 

2 Carrots (cut into 2 inch long thin pieces)
1 cup White Pumpkin (cut into 2 inch long thin pieces)
10 French Beans (cut into 2 inch long pieces and sliced horizontally)
10 Long Beans (cut into 2 inch long pieces)
1 cup Yam (cut into 2 inch long pieces)
1 Drumstick (cut into 2 inch long pieces)
1 Raw Banana (cut into 2 inch long pieces)
¼ tsp Turmeric powder
Salt to taste
Curry leaves for garnishing
2 tbsp Coconut Oil
1 cup Water
 

For grinding 

2 cups Coconut (freshly grated)
½ tsp Jeera/Cumin seed
3 – 4 Green Chilli
2 cups Curd (sour)
 

Method

  • Put all the vegetables (except white pumpkin) along with salt, turmeric powder and water in a Kadai and place it on high flame. When the water starts to bubble, reduce the flame, cover and let it cook for about 15 minutes.
  • Now add the white pumpkin and again cover and cook for another 5 minutes or till all the vegetables are cooked. They should not become mushy. 
  • Coarsely grind coconut along with jeera, green chilli and curd. Keep this aside.
  • When the vegetables are cooked, add the ground coconut mixture into it.
  • Mix gently so that the vegetables are not mashed. Let it cook for another 2 minutes or till the gravy starts to bubble.
  • Switch off the flame and pour coconut oil on top along with curry leaves.
  • Serve and enjoy along with steamed rice.


* I usually take the quantity of the ingredients as per my taste. So you can always adjust the spices as per your taste*


Thanks for visiting
Happy Cooking!!

Thursday, 1 August 2013

Cucumber & Carrot Pickle


A simple and easy pickle that you might have tasted in a Chinese restaurant. In Indian restaurants, as soon as we sit in a table, they serve papads. Similarly in Chinese restaurants, they serve this pickle or kimchi. This pickle is spicy, sweet and salty. All three flavours in one dish.


Tuesday, 30 July 2013

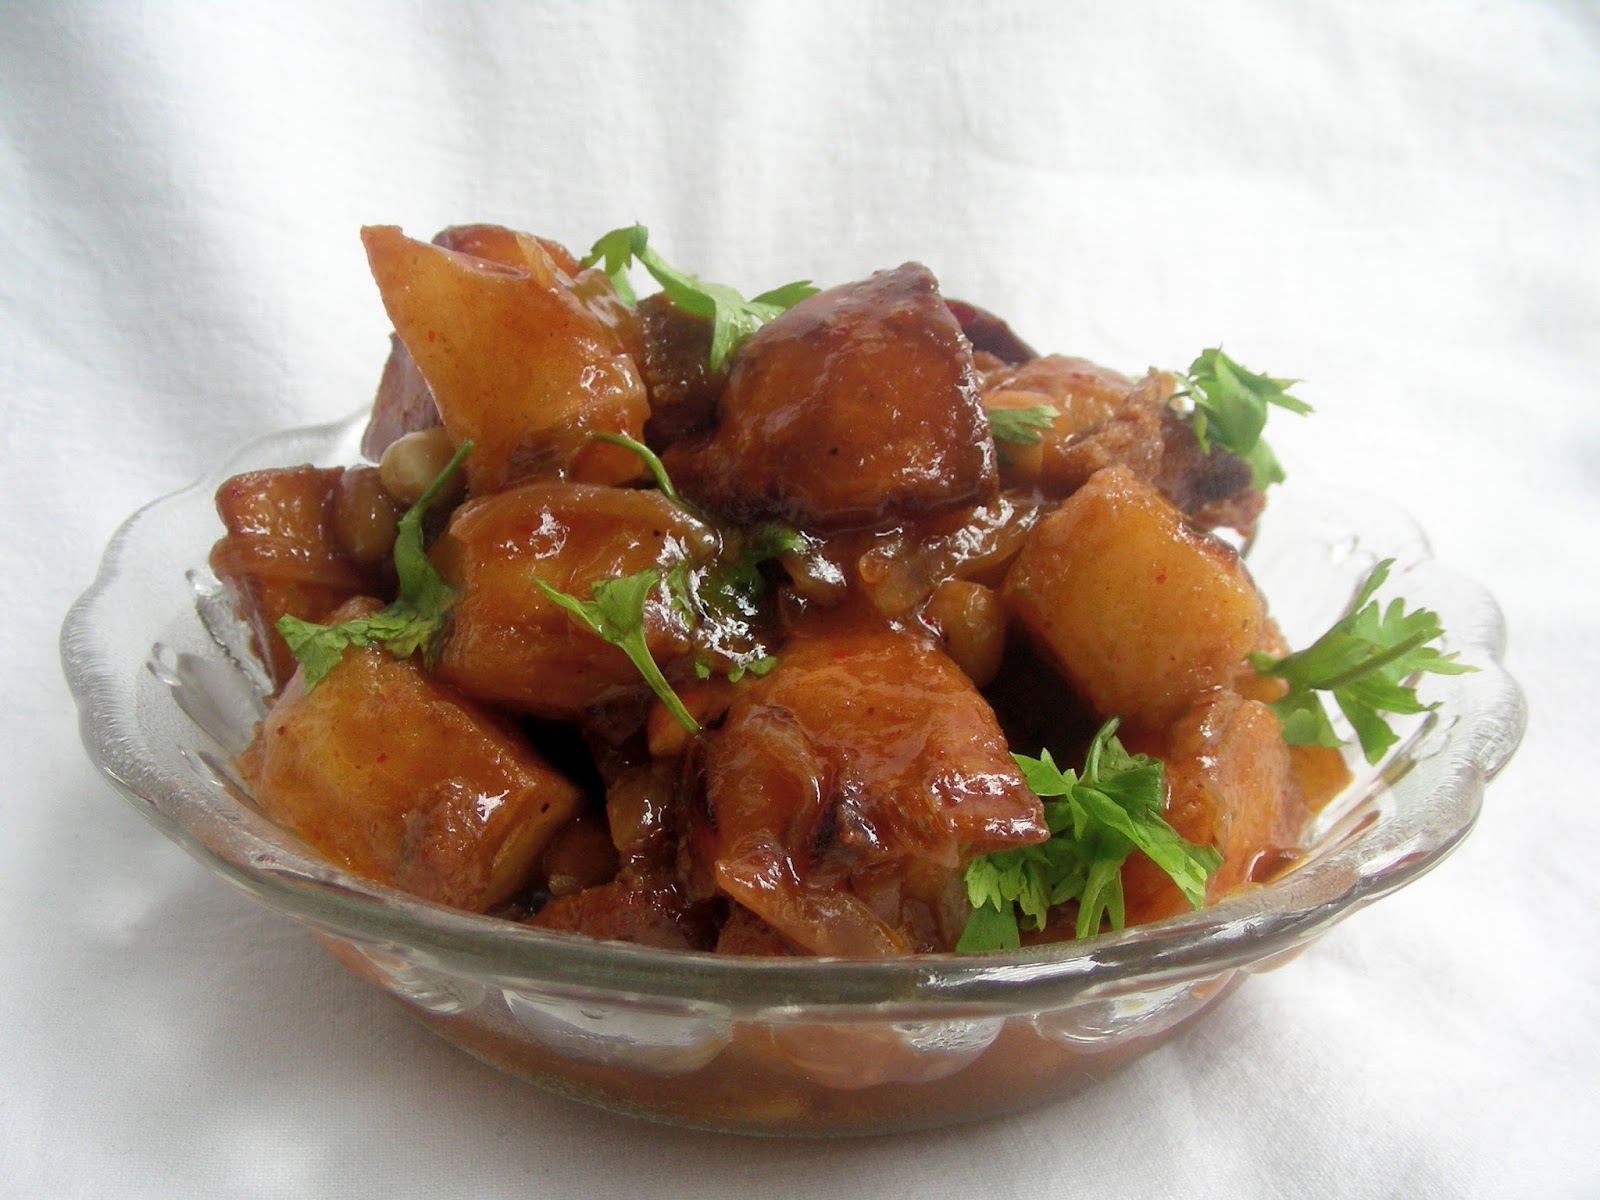
Kung Pao Potatoes


By now, you might have come to know that i am a big fan of Chinese cuisine. Not only me, my daughter also love it a lot. So every now and then i try to make a Chinese dish.

I was lazily searching in the net for a recipe with potatoes . I was not at all in a mood to prepare anything. But when i saw this recipe from Sanjeev kapoor's Kitchen, i was boosted up. Yea!! sometimes it happens with me. I just get the energy instantly and without a second thought rushed into my kitchen and there you go....i started my cutting and chopping  ;)

This dish is actually very spicy, but we don't eat much spicy food, so i added less spice as per our taste.   


When i thought of making this dish, i had everything in my kitchen, except spring onion and chilli oil. So i replaced spring onion with onion and coriander leaves. Also replaced chilli oil with vegetable oil + 1/2 tsp Kashmiri red chilli powder. Take my word, the dish was just awesome. I served it with a simple and flavourful vegetable pulav (will post the recipe soon) and we all loved it a lot. 

If you love potatoes and Chinese cuisine, you will definitely love this dish. The potatoes are crispy and the juicy sauce adds to its taste. I can't put down in words how it tastes....you got to try it out...and do let me know..


Recipe source : Sanjeev Kapoor's Kitchen

Ingredients

6 Spring Onion bulbs (sliced)
4 tbsp Oil
4 Potatoes (boiled and peeled, cut into big cubes)
1 inch Ginger (finely chopped)
5 cloves Garlic (finely chopped)
2 tbsp Chilli oil (or vegetable oil + 1/2 tsp Kashmiri Red Chilli powder)
2 tsp Cornflour
1 1/4 cup Vegetable stock
3 - 4 Dry red chilli (cut into pieces)
2 tbsp Soy sauce
1 tbsp Red chilli sauce
2 tsp Sugar
Salt to taste
1/4 cup Peanuts (roasted and skin off)
2 stalks Spring onion greens


Method


  • Heat oil in a kadai and put the potatoes in it. Fry them in batches, till they turn golden brown colour. Once done, transfer them on to a tissue paper and keep aside.
  • Take cornflour in a bowl and add 1/4 cup of vegetable stock. Mix well and keep aside.
  • In the meantime, heat chilli oil in another kadai. Add dry red chilli. Saute for a minute.
  • Now add onion, ginger and garlic. Saute till the onion becomes soft and translucent.
  • Add soy sauce, red chilli sauce, sugar and salt. Mix well.
  • Now add roasted peanuts and the rest of the vegetable stock. Mix well and let it cook for a minute.
  • Now add cornflour mixture and keep stirring for a minute.
  • Add fried potatoes and mix gently.
  • Garnish with spring onion greens and serve it hot with roti, vegetable pulav, fried rice or noodles.

Notes:
  1. When you boil potatoes, make sure that they are not fully cooked or else it will break while frying. 
  2. If you don't have spring onion, you may prepare the dish using onion and for garnish use coriander leaves, even though it is not the authentic way of preparing a Chinese dish. But still it will taste good.
  3. For Chinese dishes, do the preparation first and then start cooking as it is done very fast on high heat.


* I usually take the quantity of the ingredients as per my taste. So you can always adjust the spices as per your taste*


Thanks for visiting
Happy Cooking!!